
How To Install Bamboo Wall Panels At Home
0Shares
Have you ever considered transforming your home’s interior with a touch of nature? What if you could do this while promoting sustainability and enhancing the aesthetics of your living space? Well, here’s your chance to learn how to install bamboo wall panels at home.
Bamboo wall panels are not just beautiful; they’re a green alternative to traditional wall coverings. Made from one of the fastest-growing plants on earth, these panels are a testament to style and sustainability. They offer a unique texture and a distinctive, organic look that can give any room a tropical or zen-like ambiance.
But the benefits don’t stop at aesthetics and eco-friendliness. By learning to install bamboo wall panels yourself, you’re saving money and developing valuable DIY skills. The art of home improvement is empowering, providing a sense of accomplishment while boosting the value of your home.
So let’s dive into the world of bamboo wall panels and discover how you can transform your walls from ordinary to extraordinary!
Gathering Your Materials
Before we get started, we must ensure we have all the right tools to transform our walls from drab to fab. Here’s a handy list of essential items you’ll need:
① Bamboo Wall Panels: They come in a variety of styles, so choose something that suits your taste.
② Measuring Tape: Precision is key – you don’t want to end up with wonky walls!
③ Pencil: To mark measurements and guide your work.
④ Level: To ensure those panels are perfectly horizontal.
⑤ Saw: For cutting the panels to the right size.
⑥ Adhesive: To stick the panels onto your walls.
⑦ Trowel: For spreading the adhesive evenly.
⑧ Sandpaper: For smoothing down any rough edges.
Safety First!

Now, just as we would only dive into a swimming pool if we checked the water’s depth, we should consider safety precautions before we start a DIY project. So, here are a few points to keep in mind:
✅ Clear The Working Area
Before installing your bamboo wall panels, creating a safe and clutter-free workspace is essential. Remove any furniture, decor, or other obstacles from the area where you’ll be working. This will give you ample space to move around and work freely and prevent any accidental damage to your belongings.
Creating a clean and safe work environment ensures a smoother installation process and guarantees a better finish for your bamboo walls.
✅ Protective Gear
Working on a DIY project, such as installing bamboo wall panels, requires you to be proactive about your safety. Therefore, always remember to wear the right protective gear before starting the process. This includes durable gloves to protect your hands from any sharp edges or splinters that might be present on the bamboo panels.
Safety glasses will shield your eyes from any dust or tiny particles that may get dislodged while handling or cutting the boards. If you use power tools, consider using ear protection to safeguard against loud noise.
Lastly, a dust mask can protect you from inhaling adhesive fumes or bamboo dust. Remember, safety is paramount in any DIY project, and proper protective gear is the first step towards ensuring it.
✅ Ventilate
Proper ventilation is crucial when installing bamboo wall panels, especially if you’re using certain adhesives. These adhesives often release fumes which, in a confined space, can lead to discomfort or, in some cases, cause serious harm to your health. Therefore, ensuring good air circulation in your work area is essential.
Open all windows and doors, and if possible, use a fan to help circulate the air. This will not only help to disperse any harmful fumes but can also assist in accelerating the drying and curing process of the adhesive.
✅ Children and Pets
Children and pets might be curious about the ongoing work and may wander into the workspace, which may be unsafe for them. Hence, keeping them away is advisable until the installation process is completed. Sharp tools, adhesives, and the bamboo panels themselves could pose a risk.
Also, the noise and disruption could cause distress. For their safety and your peace of mind, ensure children and pets are kept in a separate, secure area away from the installation site. The last thing you want is a mishap or disturbance while you’re trying to create your beautiful bamboo wall.
Remember, the goal here is to have fun while creating a beautiful new space, so let’s do it safely!
Step-by-Step Guide to Installing Bamboo Wall Panels
Now that we have all our materials and safety considerations, it’s time to get down to business. Here is a step-by-step guide on how you can install bamboo wall panels at home:
Step ①: Preparing the Wall
The canvas on which we’ll be exhibiting our beautiful bamboo panels. To ensure the panels adhere correctly and look their best, we must give our wall a bit of TLC first. This means cleaning and drying it thoroughly.
Start by removing any old wallpaper or paint flakes with a scraper. Then, wipe the wall with a damp cloth to remove dust and grime. A clean wall is a happy wall, and a happy wall is more than ready to rock those bamboo panels!
Once your wall is spick and span, give it some time to dry completely. We wouldn’t want any moisture trapped behind our bamboo, would we?
Now, put your detective hat on! Check the wall for any uneven surfaces or protruding nails. If you find any, use sandpaper or a leveling compound to smooth them out. You can use your level to ensure the wall is perfectly flat. By checking and leveling the wall, you’re making sure your bamboo panels will look as smooth and stylish as you envisioned.
Remember, your wall is the foundation for your bamboo panels. The better prepared it is, the better the final outcome will be. So, pull up those sleeves, get your gear, and show this wall some love!
Step ②: Measuring and Cutting the Bamboo Panels
Measurement is the secret ingredient to a flawless finish. Precision at this stage will ensure a professional look, and let’s be honest, we all want our walls to wow our guests, right?
Begin by measuring the height and width of the wall using your measuring tape. Call upon those math skills you thought you’d never use again and calculate the number of panels required to cover the entire wall. Remember, adding an extra 10% to account for cuts and waste is always wise.
Mark the measurements on the bamboo panels with your pencil. Now, you might be thinking, “This sounds easy!” But we’re going to level up here – literally! Use your level to ensure your marked lines are straight. After all, we want those panels to be as perfect as Picasso, not leaning like the Tower of Pisa!
Once your measurements are marked, it’s time to engage with the raw power of your saw. But before you channel your inner carpenter, let’s pause a moment. Cutting bamboo requires care and attention to avoid splintering or damaging the panel. Always use a sharp, fine-toothed saw for clean, precise cuts.
For those of you using a hand saw, cut along the outer edge of your marked line to maintain accuracy. If you’re using a power saw, remember to cut with the bamboo panel face up to prevent chipping on the visible side. And remember, slow and steady wins the race! Rushing might only lead to mistakes; we certainly don’t want that.
Step ③: Attaching the Bamboo Panels
“Stick ’em up!” No, we’re not staging a holdup; we’re just ready to adhere our bamboo panels to the wall. But before we do, let’s talk about adhesive. Not all adhesives are created equal, and for bamboo panels, we recommend a high-quality construction adhesive that’s specifically designed for paneling.
Check the label for words like “heavy-duty” or “construction-grade.” These adhesives offer the strength to hold the panels securely and longevity to stand up against time.
You’ll need a cartridge gun to apply your adhesive. Load the adhesive tube into the gun and apply a generous amount to the back of your bamboo panel. Use your trowel to spread the glue evenly across the panel’s back, ensuring full coverage. We want our bamboo panels and wall to be best friends, sticking together through thick and thin!
Now, time for some panel action! Hold your bamboo panel up against the wall, aligning it perfectly with the corners and ceiling. Make sure it’s straight with your level, then press firmly. You could even gently tap the panel into place with a soft mallet. Do this for all panels, working your way across the wall. Check periodically to ensure your newly installed panels are secure and not slipping or moving.
Is a panel not sticking as well as it should? Don’t panic! You can use panel pins or finish nails for extra security. Make sure to countersink the nail heads, then fill the holes with a matching wood filler for an invisible finish.
Step 4: Sealing the Bamboo Panels
Bravo! You’ve successfully mounted your bamboo panels, but we’re not quite done yet. We need to apply a sealant to keep these panels looking as dazzling as the day you installed them. This magical elixir will protect your panels from dust, moisture, and the odd coffee spill that might occur during an animated conversation!
To begin, choose a clear polyurethane sealant specifically designed for wood. This will allow the natural beauty of the bamboo to shine through. Before beginning, make sure the room is well-ventilated – we care about your health as much as we do about your walls! Using a paintbrush, apply a thin sealant layer to the bamboo panels, covering the entire surface evenly. It’s like applying sunscreen to your skin, but this time, your walls need protection!
Allow the sealant to dry completely before applying a second coat. Two coats should generally suffice, but if you want to be extra safe, go for a third one. Remember, the more, the merrier!
Step 5: Checking and Caring for Your Bamboo Panels
Now that your bamboo panels are sealed and secure, it’s time for some aftercare. Like a good friendship, your relationship with your bamboo panels should be based on regular check-ins and a little TLC.
Every few months, take a close look at your panels. Make sure that they still adhere well to the wall. If any panel seems loose, you can constantly reapply some adhesive or add a few more nails. Check for any signs of wear, like fading or chipping. Remember, a stitch in time saves nine!
For day-to-day maintenance, a quick wipe with a damp cloth will keep your panels fresh and dust-free. Avoid using any harsh chemicals or abrasive materials – they won’t be kind to your bamboo. And remember, just like a good wine, your bamboo panels will age and change color over time. This is a natural process and part of the charm of using a natural material like bamboo.
And there you have it! You’re now a fully-fledged bamboo panel installation pro. With your new knowledge and skills, you can transform any space into a tranquil, stylish haven.
Common Mistakes and How To Avoid Them
As you set sail on your bamboo-paneling journey, a few rocks might be along the way. Fear not, for we are here to help you navigate around them. Here are some of the common mistakes made during installation and practical advice to avoid them:
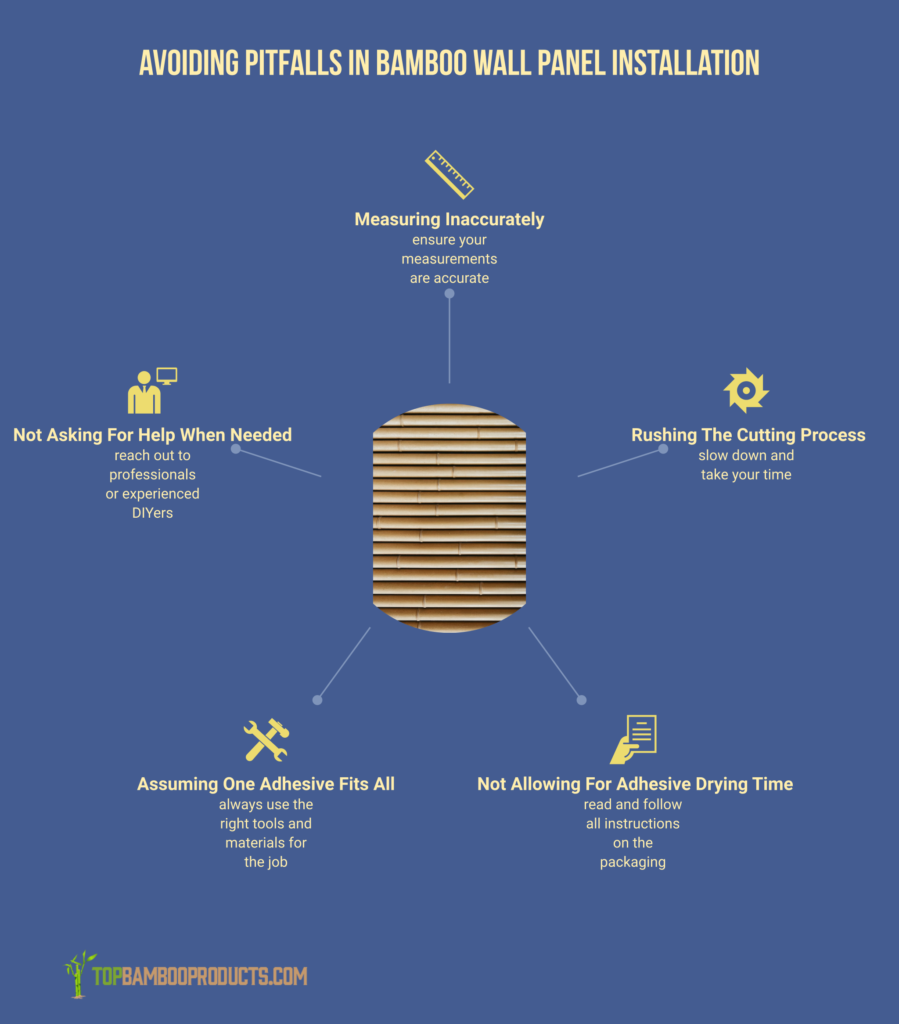
❎ Measuring Inaccurately
They say, “Measure twice, cut once,” right? Well, they’re not kidding! One of the most common mistakes made when installing bamboo wall panels is inaccurate measuring. It’s easy to get excited and rush into cutting, but that’s where missteps occur.
So, take your time, double-check those numbers, and ensure your measurements are as accurate as they can be. A few extra minutes spent here could save you a lot of hassle later on!
❎ Rushing The Cutting Process
No matter how tempted you may be to rush through the cutting process, slow down and take your time. A key element to achieving outstanding results is ensuring each cut is precise. To do this, we recommend using a sharp blade or saw to make clean cuts that won’t break or chip during installation.
You can even use sandpaper to smooth out the edges of each cut, achieving a seamless finish. This will make the job look professional and fabulous!
❎ Not Allowing For Adhesive Drying Time
When it comes to the adhesive, patience is key. Before you start sticking panels to the wall, make sure to read and follow all instructions on the packaging. This will ensure that your adhesive dries appropriately and forms a strong bond with the wall.
Allowing for adequate drying time ensures that your panels are firmly attached and won’t fall off down the line. Nothing worse than a panel falling in the middle of dinner! So, make sure to give your adhesive enough time to do its job correctly.
❎ Assuming One Adhesive Fits All
As with most things in life, not all adhesives are created equal. Different brands and types of adhesive have different properties, and what works well for one kind of material may not work as well for another. For bamboo paneling, you want an adhesive that is strong and durable but also allows some flexibility as the bamboo expands and contracts with changes in temperature and humidity.
Do not assume that just because an adhesive says it’s for wood, it will work well with bamboo. Bamboo is a unique material with its properties and needs. Do your research, ask for advice, and always use the right tools and materials for the job. This will ensure that your bamboo wall panels will look great and last for years to come.
❎ Not Asking For Help When Needed
Don’t hesitate to ask for assistance if you’re unsure about any aspect of the installation process. Installing bamboo wall panels can be a big job, and needing help is okay sometimes. Whether it’s a question about the type of sealant to use, the best way to take accurate measurements, or how to care for your panels in the long run, don’t hesitate to reach out to professionals or experienced DIYers.
There are numerous resources available online, including tutorial videos, forums, and how-to guides, that can provide invaluable assistance. Remember, it’s better to ask a question before you start than to do it wrong and have to correct it later.
After all, the goal is to create a beautiful, long-lasting feature in your home that you can be proud of.
Frequently Asked Questions
Q: Can I use bamboo wall panels as a bamboo wall covering?
Yes, absolutely! Bamboo wall panels are a fantastic choice for covering your walls. Not only do they add a unique aesthetic to any space, but they’re also extremely durable and eco-friendly. They can be installed over most existing surfaces, making them an excellent option for new constructions and renovations.
Q: What makes a bamboo fence a good option for outdoor spaces?
Bamboo fences are an attractive and sustainable choice for outdoor areas. They provide privacy while adding a natural, tranquil vibe to your yard. Moreover, bamboo is known for its durability, standing up well to various weather conditions. It’s also a renewable resource, making it an eco-friendly alternative to traditional fencing materials.
Q: Can bamboo wall panels be used for an accent wall?
Yes. Bamboo wall panels can serve as a stunning accent wall in any room. They instantly add warmth, texture, and personality to your space. Whether it’s your living room, bedroom, or office, a bamboo accent wall can be a sophisticated focal point that steals the show.
Q: Can I apply bamboo strips to my kitchen island front?
Absolutely! Bamboo strips are a great way to revamp your kitchen island front. Bamboo’s natural and unique aesthetic adds a charming touch to your kitchen area. Moreover, bamboo is easy to clean and maintain, making it a practical kitchen choice.
Q: Do I need molding when installing bamboo wall panels?
While not always necessary, molding can provide a neat and finished look to your bamboo wall panels. It helps to cover the seams where the panels meet and adds an extra layer of detail to the wall. However, whether or not you choose to use molding will depend on your specific aesthetic preferences and the look you’re aiming to achieve.
Final Words
And there you have it – the entire process of installing bamboo wall panels and a detailed overview of common mistakes to avoid. Isn’t it exhilarating to know that you have the power to transform your space all by yourself? Remember, every great venture begins with a single step, and you’ve made the right move by educating yourself thoroughly. Embrace the process, learn from your mistakes, and, most importantly, enjoy the journey. After all, you’re not only enhancing your environment but also acquiring new skills and building character along the way.
Take a moment to imagine how fulfilling it will be when you lean back and admire your handiwork – a beautifully transformed space that resonates with nature and tranquility. Go ahead, roll up those sleeves, and let’s make that dream a reality. You can do this, and I am here cheering you on!
0Shares